Contents
Visual Studio Code (hereinafter referred to as VS Code) is really a very powerful IDE, even better than Visual Studio! Next, let’s introduce how to use VS Code to develop .NET CORE.
Since .NET 5.0 now supports cross-platform and is mainly based on CORE, it can be developed directly using VS Code. Next, let me talk about why I use VS Code to develop: smiley:
1.Why use VS Code
VS Code is a lightweight code editor that has the following advantages over Visual Studio (hereinafter referred to as VS):
1.1 Lightweight and fast
VS Code is a lightweight application that starts quickly and uses little system resources. Compared with the complete integrated development environment of VS, the execution performance of VS Code is better.
1.2 Multi-platform support
VS Code can run on multiple operating systems such as Windows, macOS and Linux, enabling developers to maintain a consistent development environment on different platforms.
1.3 Strong scalability
VS Code provides a rich extension kit, which can freely expand functions according to development needs. Developers can install various language support, code snippets, themes and other extensions according to their own needs to make the editor more in line with personal preferences and workflow. And this is one of the reasons why I like it so much! Through various suites, development efficiency can be greatly improved, which is difficult for VS to match.
1.4 Rich theme resources
Although this is not a very hard requirement, I have to say that I use VS Code to a large extent, and this has a lot to do with it. Because of a good set of themes, the code will look very comfortable. After all, you will be working on it for a long time, so of course you should take good care of your eyes, and a good theme will also make your mood better :laughing:
1.5 Version control integration
VS Code has built-in support for Git version control, which can perform version control operations through the UI, and provides intuitive difference comparison and merge tools. This makes it more convenient for collaborative development or individual project management. Although this is also supported in VS, but base on the powerful extension for VS Code, it does a very good job in version control. For example, GitLen is more famous and easy to use.
1.6 Built-in terminal
VS Code has a built-in terminal function, allowing developers to execute commands in the editor, such as starting the server, executing tests, etc. This increases productivity by eliminating to switch to other terminal tools. This is also a feature that attracts me very much. It is because of the existence of this terminal that it is more convenient to develop .NET Core directly on it. If you also need to develop the Angular, I think you will have to use the terminal :). And when you open the terminal, it will automatically jump to the folder under the current project, which is very convenient!
1.7 Ecosystem support
VS Code is an open source project with a large user community, so there are plenty of tutorials, solutions, and resources available. Developers can easily find relevant resources and resolve issues quickly. This is the advantage of open source projects, because its strong community directly leads to its powerful functions, and the update frequency is very fast, which can continuously fix various problems.
1.8 Support multi-language development
Especially when developing .NET Core + Angular projects, it can directly support Angular well. So, there is no need to use two IDEs at the same time, which saves a lot of system resources!
2. Configure the .Net Core environment
2.1 Install the SDK
If you have not installed VS before, and have not tried .NET-related development, the first thing to do is to download the relevant SDK from Microsoft’s official website
https://dotnet.microsoft.com/en-us/download
2.2 Install the extension
In order for VS Code to support .NET Core well, the following extensions need to be installed:
1) DotNet Core Essentials
Through this extension, you can directly compile, create, and add references to the project in VS Code:

Use various .NET templates to create projects or related files, just like creating them in VS, very convenient

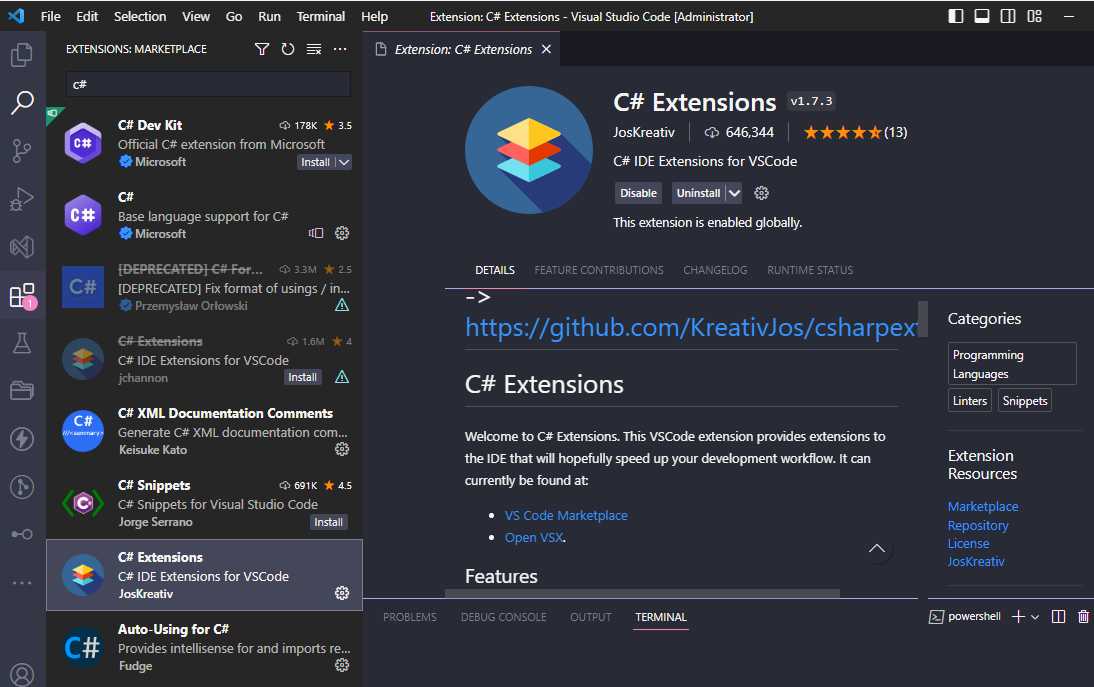
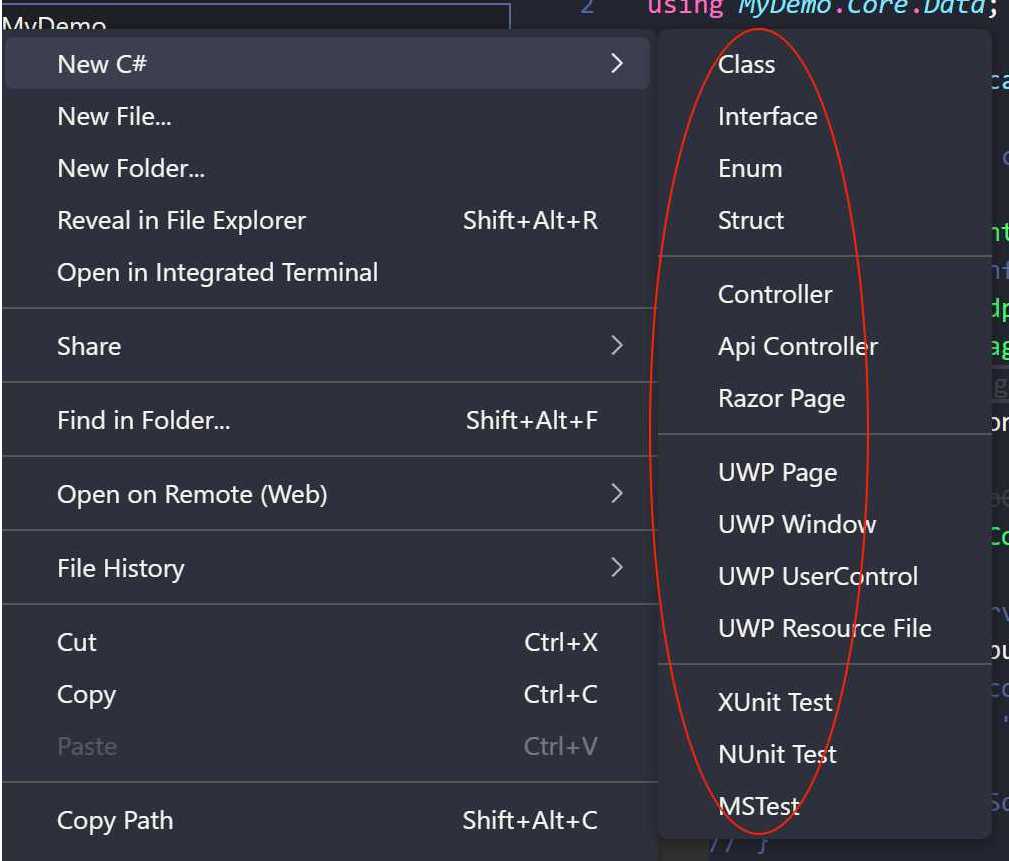
2) C# Extensions
This extension can provide you with templates for creating various .NET files. If you create a Class or Interface file, it will directly help you generate related file templates
3) vscode-solution-explorer
This extension can make your .NET project have the same effect as opening it in VS! You can directly view and manage your project directory in the form of a Solution, and then just right-click the corresponding project group to perform related operations

After installation, you will see a VS icon on the left. After clicking it, you can directly open the .sln solution file, and then browse

4) NuGet Gallery
This extension can help you install related packages from NuGet. Its interface is quite intuitive and convenient, and it can be installed for multiple project groups at one time, which feels easier to use than the one in VS.


OK, that’s all for the introduction of the basic kits, and I will make an other article on the useful extension of VS Code in the future. For the development of .Net Core, the several packages introduced above are completely sufficient :smiley:
3. Create a project
Next, let’s try to use VS Code to create a complete .Net Core project!
3.1 Create an empty folder
For example, create a folder named 001, then drag it directly into VS Code, and then open the terminal through the menu button above
3.2 Create a project using the DCE extension
Open the VS Code command line and enter dce new to create a new Project:

Choose DotNet Core

Then select C#, and a list of templates for various projects will appear
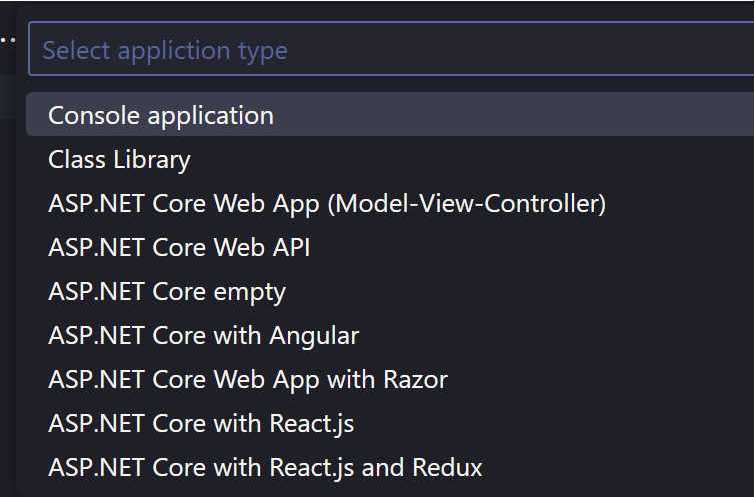
This time we choose ASP.NET Core Web API, directly create an API project, and then the first thing to enter is the name of the entire solution, such as I enter MyDemo here, and then enter the name of the project team, such as I Enter MyDemo.API, and then generate a complete project with the following structure

4. Test and run the project
The last step is to test whether the project we created can run normally! Here are two ways to run, one is to start directly in the terminal with the command line, and the other is to start with debugging. Now we try two ways:
4.1 Start from the command line
Open the project directory in the terminal, in my example above, it is MyDemo\MyDemo.API, and then execute the following command:
dotnet watch run
The reason for using watch that it can observe all code changes in real time. As long as there is a change, the website will be automatically updated, and the effect of the change can be seen immediately. It is very convenient, but if you use VS, you can’t do this.
After running, you will see the following interface, and the API page of Swagger will be opened automatically at the same time

Pages of the Swagger API documentation

4.2 Run in debug mode
Click the debug button on the left side, click the Run and Debug button, then several options will pop up, just choose the first .Net 5+ and .Net Core, and then will automatically create a debugger for your require with configuration file

At this time, a prompt box will appear in the lower right corner, just click “YES”

Then a configuration file for debugging will be created, then go back to the debugging window and click the small green triangle above to start it.

However, the directly opened URL cannot be accessed at this time. You need to manually enter the URL of the Swagger API (e.g http://localhost:5105 with my case), where you can directly set the breakpoints in it and then debug!
Summarize
The above is the whole process of how to use VS Code to develop .Net Core. The whole process is actually very simple and convenient, and with the powerful extensions of VS Code, it will make your subsequent development work more effective! Let’s give it a try today! :smirk:
The Chinese Version:
![]()